Workspace
All work happens inside a workspace. A workspace is an isolated working space that belongs to an organization — the fundamental unit whether you work alone or with a team.
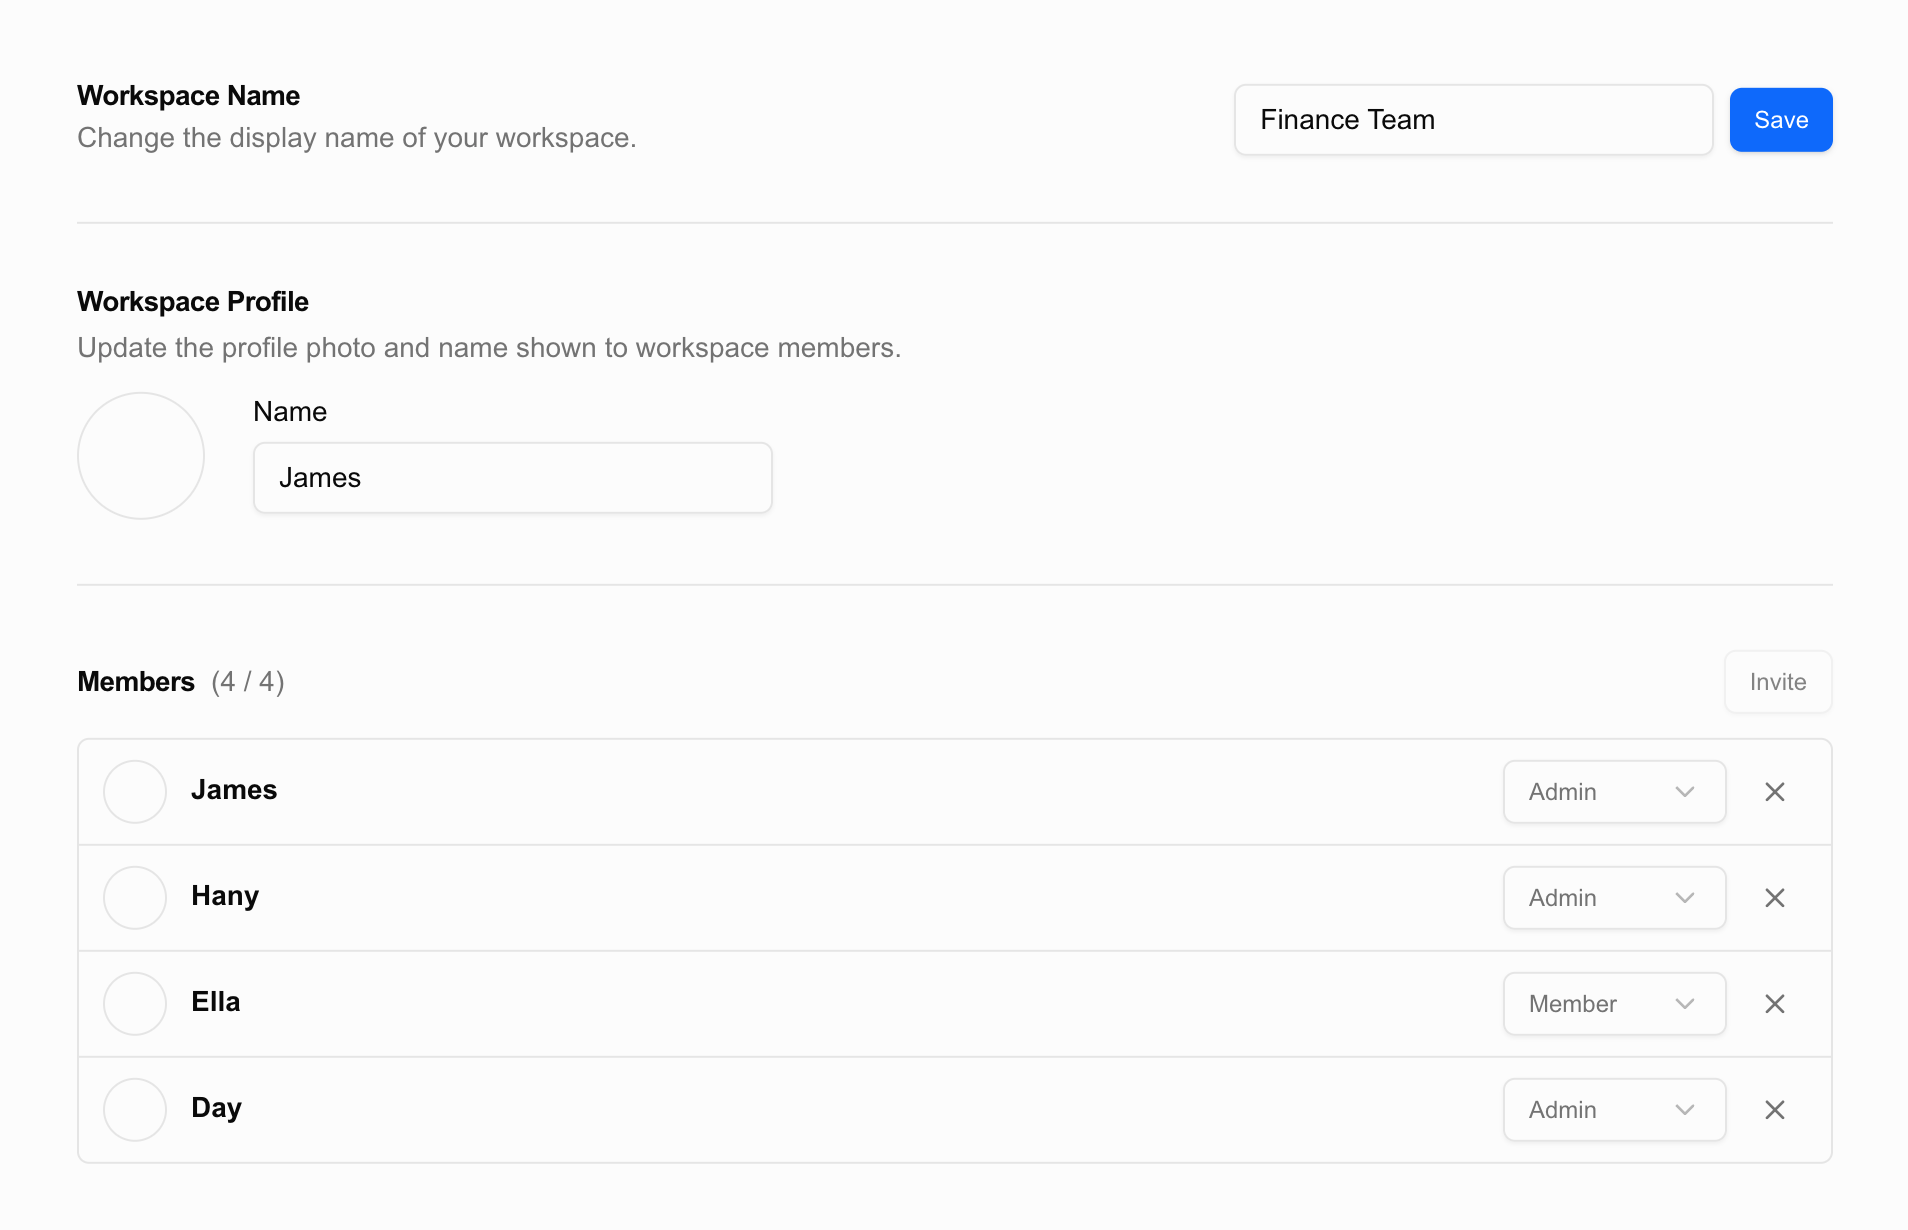
Organization → Workspace → Folder
Gridie has a three-level hierarchy.
- Organization: The top-level unit that bundles workspaces, members, and billing. One organization can have multiple workspaces.
- Workspace: A working space for a team or project. Workspaces are isolated from each other.
- Folder: Organizes workbooks, tables, and pages inside a workspace, with access permissions configurable per folder.
During sign-up onboarding you either create a new organization or join one you were invited to. When creating a folder, you choose its visibility: shared (accessible to all workspace members) or private (only you).
→ Learn more about the permission hierarchy
Switching Between Workspaces
Click the workspace name at the top of the sidebar to open the switcher menu. It lists the workspaces in the same organization, and switching takes one click.
- New workspace: Only organization owners and admins can create a new workspace from this menu.
- Workspace settings: Opens the settings screen for the current workspace.
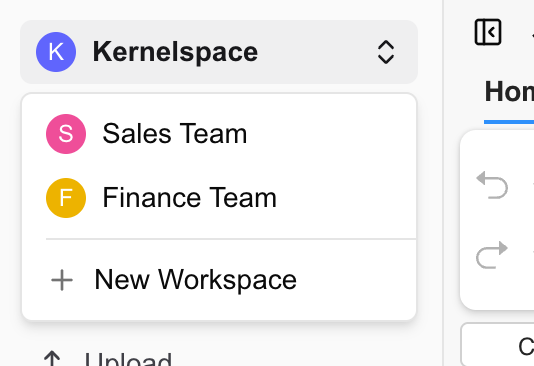
To move to another organization, open the organization screen via Manage organization in the user menu at the bottom of the sidebar, then use the organization switcher at the top of that screen. Switching organizations swaps members, billing, and credits all at once.
Inviting Team Members
Team members are invited to the organization first, then added to workspaces. Only organization admins and above can send invitations.
- Go to User menu → Manage organization → Members tab.
- Click Invite members and enter email addresses. You can invite several people at once, separated by commas or new lines.
- Choose the invitees’ organization role (admin / member) and the workspaces they should access.
- Invitation emails are sent, and invitees join the organization when they accept.
Invitations consume the organization’s seats. Pending invitations also reserve a seat, and if seats run out you can add seats to your plan and invite again. → Seats and billing
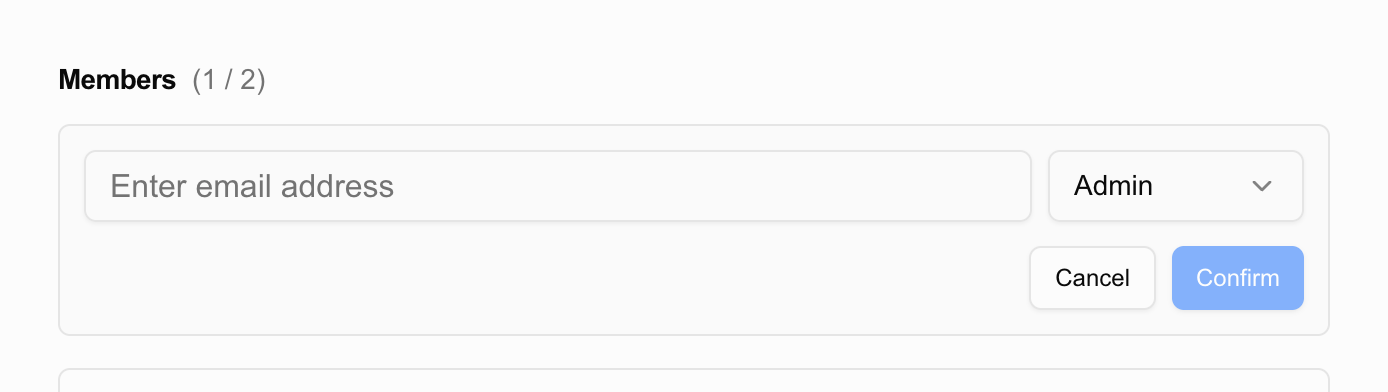
Existing organization members are added to a workspace via Add from organization in the workspace detail of the organization screen or in workspace settings. This does not consume an extra seat. Instead of adding people one by one, you can also grant workspace access to a group.
Member Roles
Within each workspace, members have one of the following roles.
| Role | Can do |
|---|---|
| Owner | Manage everything in the workspace, including transferring ownership and deleting it |
| Admin | Change name and description, manage members and groups, configure the database and other workspace settings |
| Member | Edit shared folders; restricted folders require separate permissions |
Organization roles and workspace roles are separate. Even an organization admin must be added to a workspace to work in it.
Folder Permissions
Being a workspace member doesn’t automatically grant access to every folder. Permissions can be set individually per folder, and you can limit visibility to only the people or groups who need it.
→ Learn more about permissions
The number of members you can invite depends on your organization plan’s seat count. See Subscription & Credits for details.
Trash
When you delete a workbook, table, page, workflow, or folder, it moves to the trash. This works the same whether you delete one item in the sidebar, select several and delete them together, or ask the agent to delete it. Deleting a folder moves everything inside it as well.
Right after deleting, click Undo on the notification to bring the item back immediately. To restore it later, go to Settings → Workspace → Trash, find the item, and click Restore.
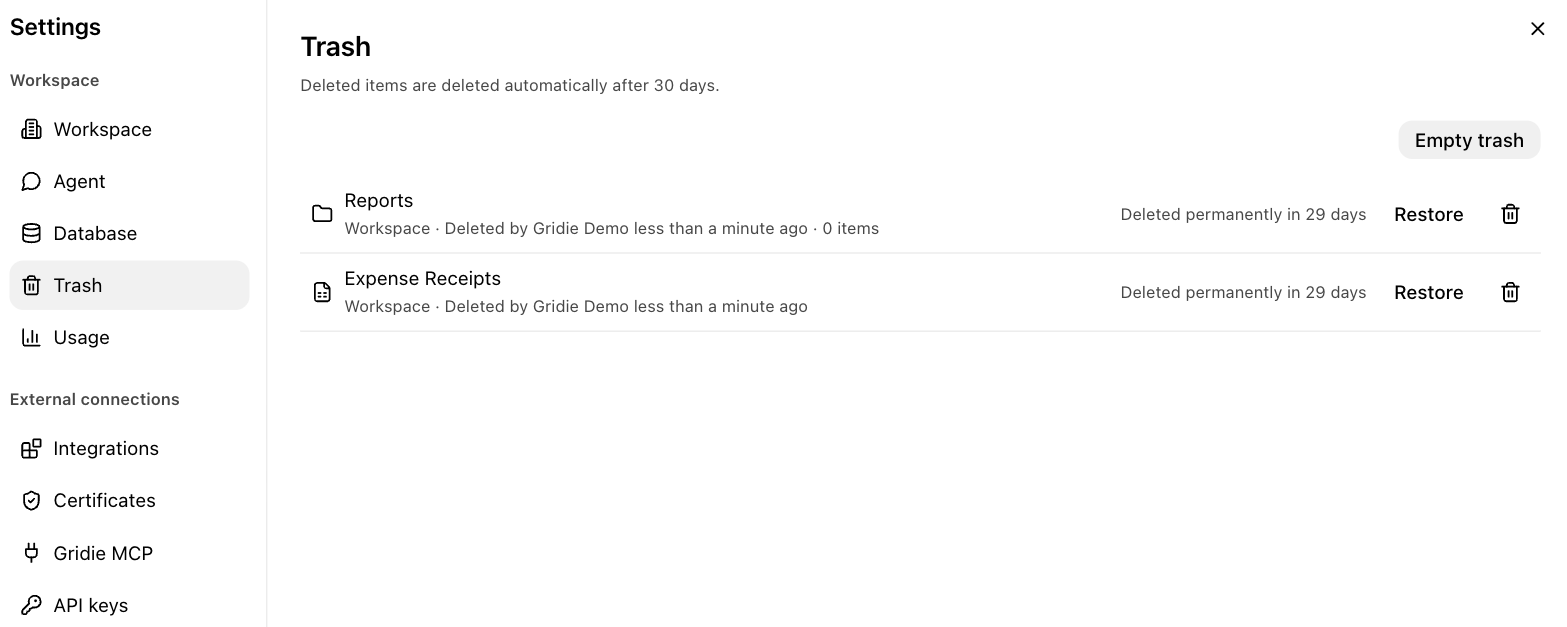
- If the original folder is also in the trash, the item is restored to the top level of the workspace.
- If an item with the same name already exists, it is restored with a number added, such as “Name 2”.
- Items in the trash are deleted permanently after 30 days. To delete sooner, click Delete permanently on an item, or use Empty trash to clear everything at once. Permanently deleted items can’t be restored.
The trash shows the items you can restore. Anyone who could delete an item can restore it. Permanent deletion is available to the person who deleted it, workspace admins, and admins of the folder that contains it.
Managing workspace tables
Under Settings → Workspace → Database, the Tables list shows every table in the workspace in one place.
- The folder path of each table appears next to its name. Click it to open that table.
- Tables you have write access to can be deleted right from this list. Deleted tables move to the trash.
- Only tables with the Allow API access switch turned on can be reached with an API key.
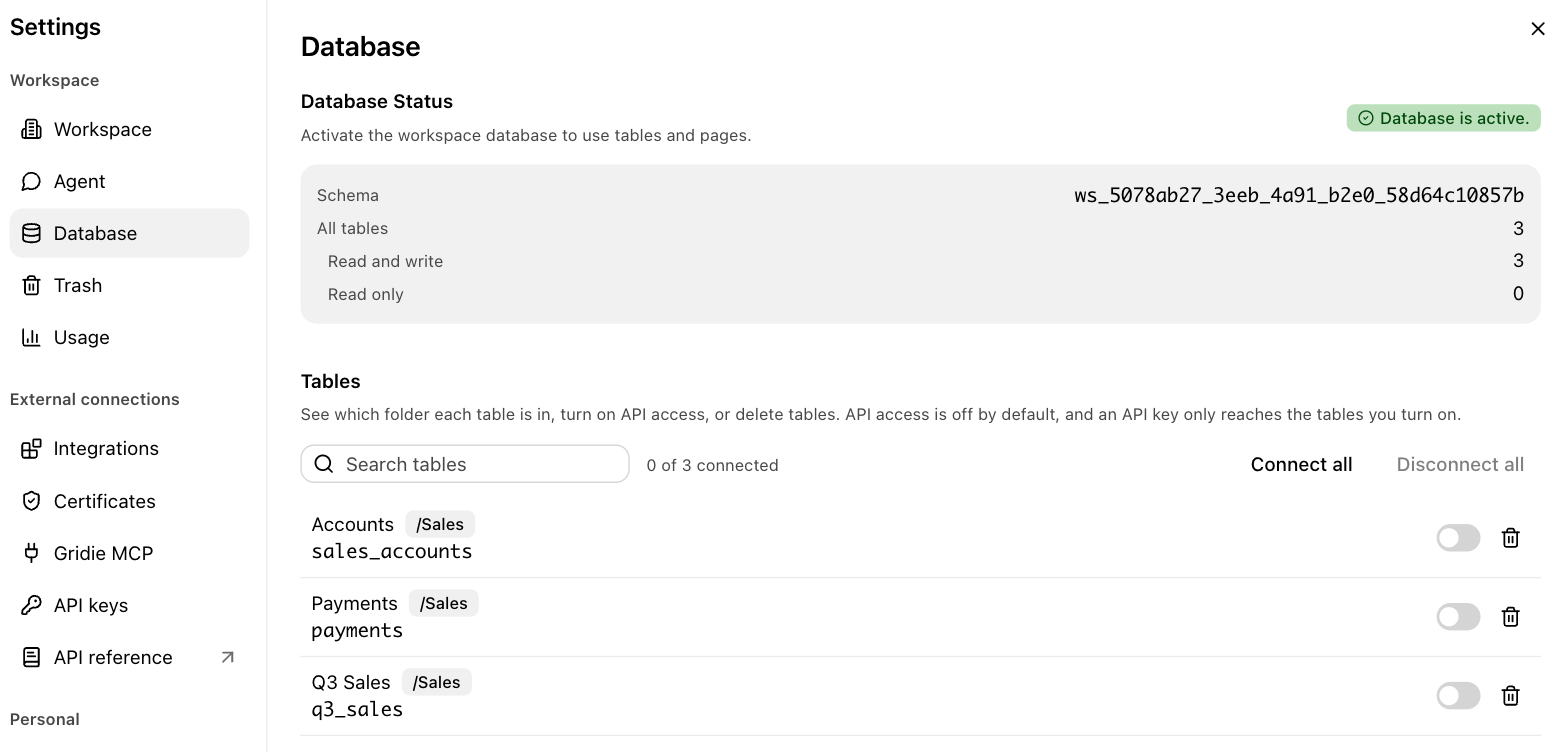
When the database holds tables that don’t appear in any folder or in the table list, workspace admins also see a Tables missing from the list section. Click Restore to bring a table back at the top level of the workspace, or delete it to remove its data as well. Delete all cleans them up at once.