Schedules
Schedules let you run a workflow or an agent message automatically at a set time. Choose a recurrence such as every Monday morning or the 1st of each month, and it runs on our servers — no need to keep your browser open.
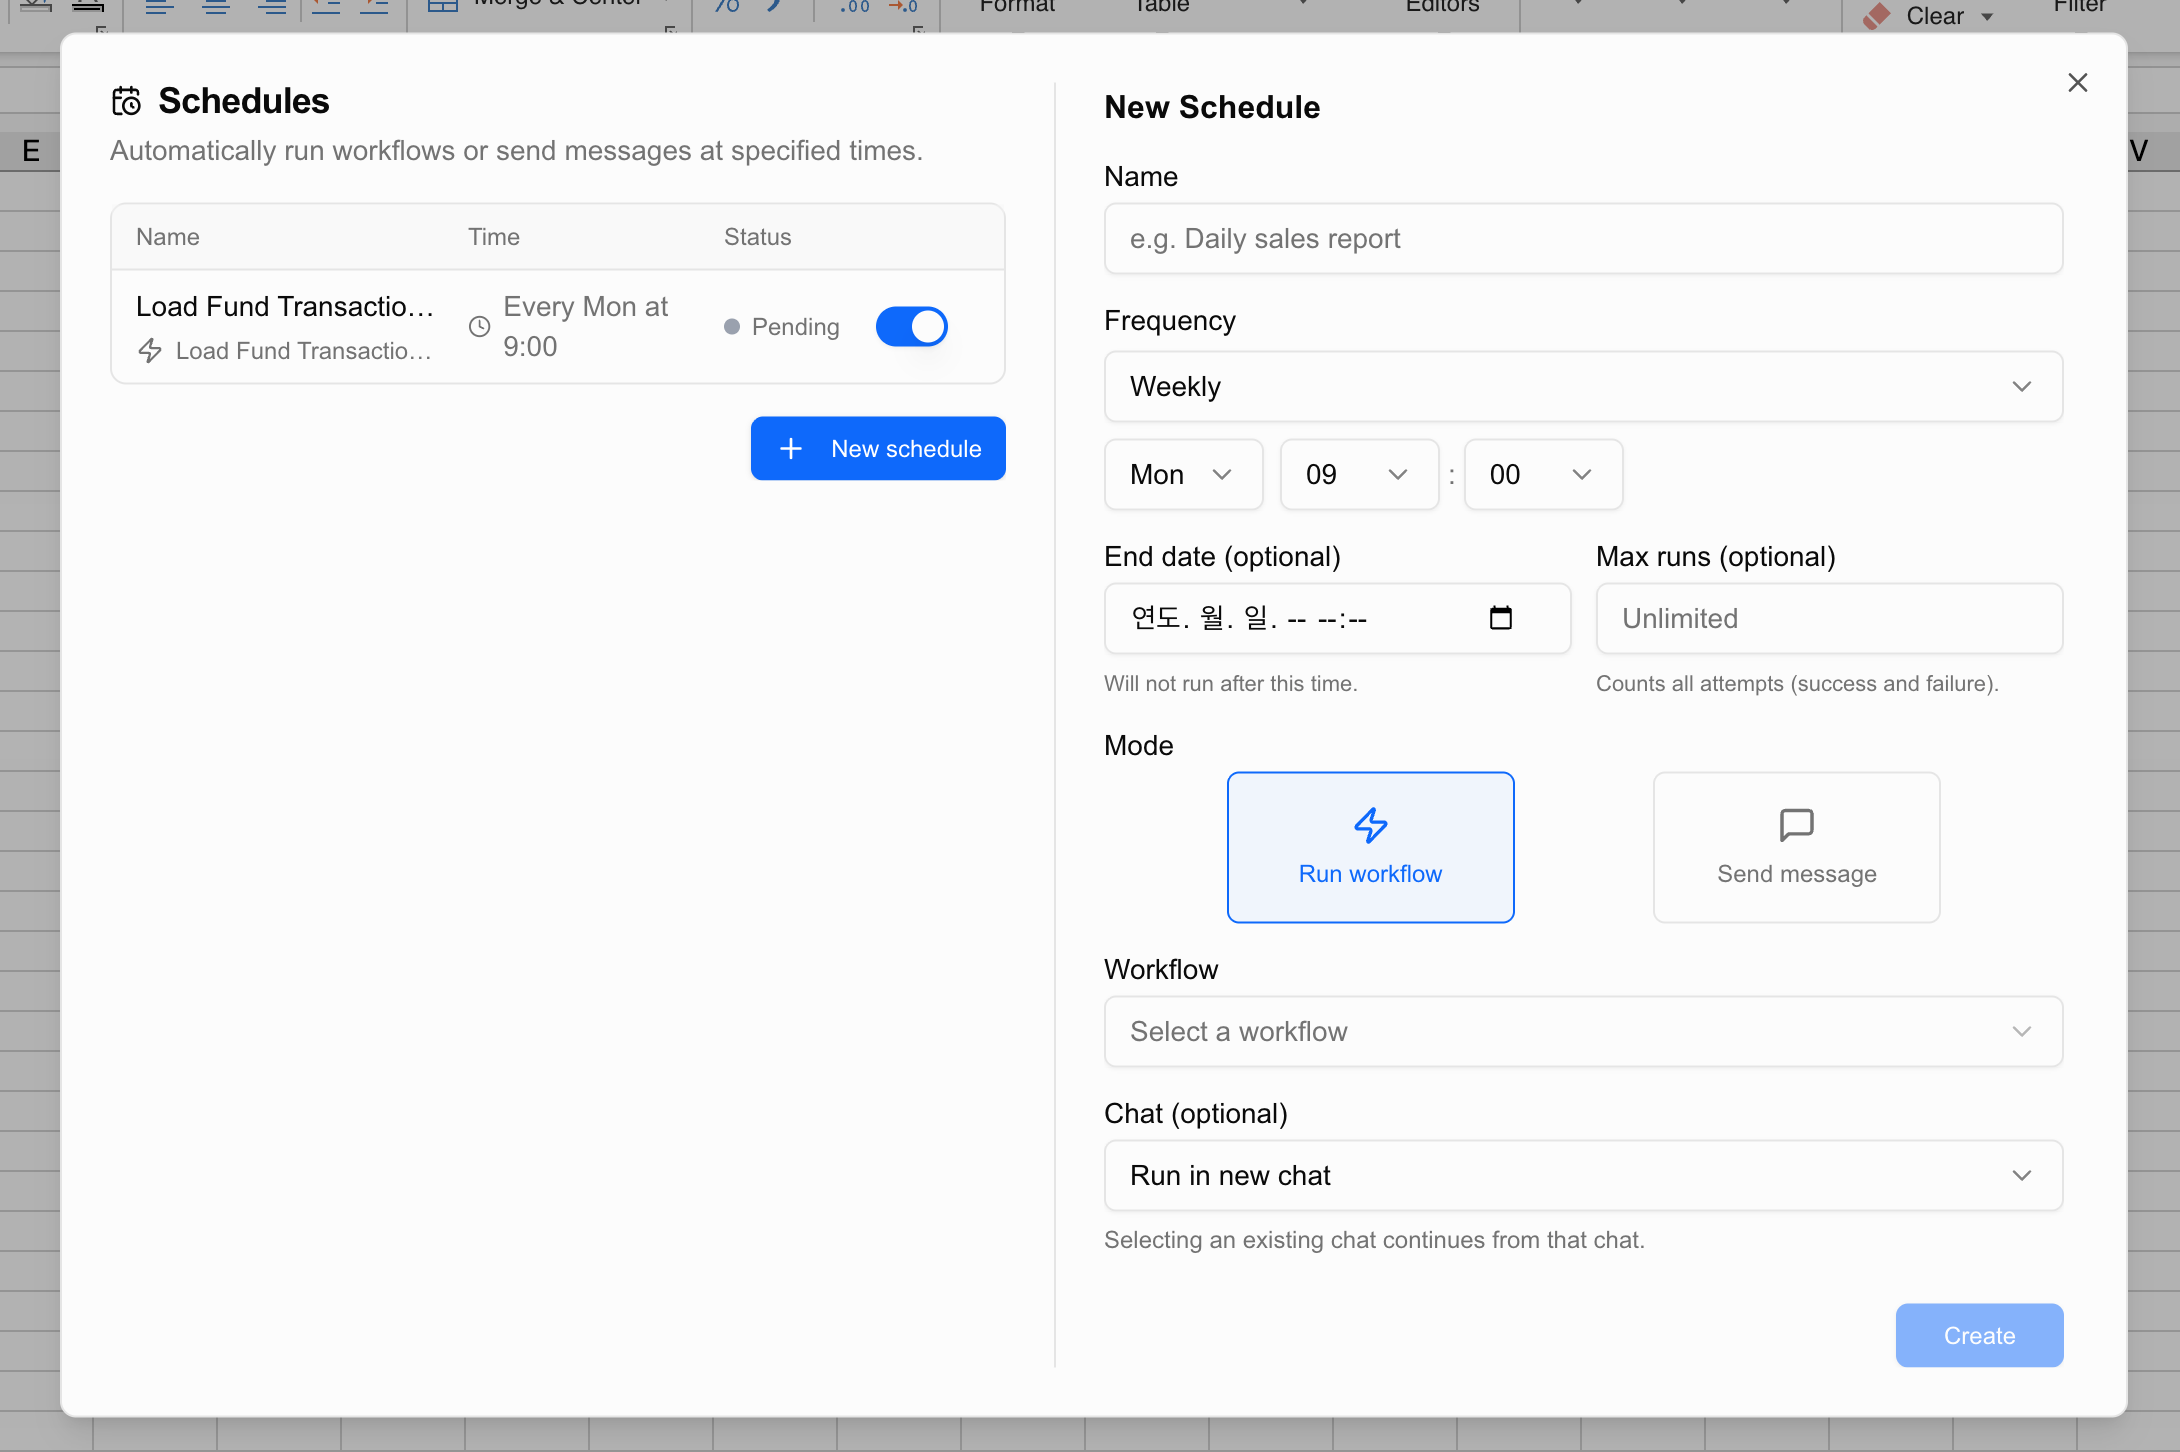
What is a schedule
A schedule reserves a recurring task to run automatically at a set time. Once registered, two things happen on their own:
- It runs automatically on the server at the recurrence and timezone you set (hourly, daily, weekly, monthly, and so on). You don’t need to keep your computer or browser open, and you don’t have to be logged in when it runs.
- Each run is recorded in a chat, so you can review the results the next time you visit.
What you can schedule
A schedule can target one of two things:
- A workflow: run a saved workflow at a set time. If the workflow requires inputs, you can supply the values to use when you set up the schedule.
- An agent message: schedule a natural-language message to the agent. At the set time, the message is sent to the agent and the task is carried out.
Creating a schedule
The easiest way to create a schedule is to ask the agent in plain language. In the chat, describe what to run and how often.
Ask the agent
Describe the workflow (or message) to run and the recurrence in natural language.
"Run the 'Weekly Sales Report' workflow every Monday at 9 AM""On the 1st of every month at 8 AM, send the agent the message
'Summarize last month's sales by sheet'"The agent understands the request and registers the schedule with the right recurrence.
Recurrence and timezone
Schedules use a cron expression to define the recurrence. For example, 0 9 * * 1 means “every Monday at 9 AM.” When you ask in plain language, the agent converts it to the right expression for you, so you don’t need to memorize cron syntax.
The timezone defaults to Asia/Seoul (Korea time). To run on another region’s clock, mention it in your request, for example “in New York time.”
Everyday phrasing such as “hourly,” “every day at 8 AM,” “every Friday at 6 PM,” or “the last day of each month” works fine — the agent turns it into the right recurrence.
Confirm registration
Once the schedule is registered, its name and recurrence are shown. From then on, it runs automatically when the set time arrives.

Create one from the screen
Open Schedules in the sidebar and click New schedule to walk through three steps.
- What should run regularly? Pick a saved workflow, or write the request to send the agent each time.
- When should it run? Set the repeat interval, then choose to run forever, until a set date, or a set number of times.
- Name this schedule. This name shows in the list and in run notifications. You also choose here whether only you can see it (Only me), which chat it runs in, and whether to get the result by email.
Editing a schedule
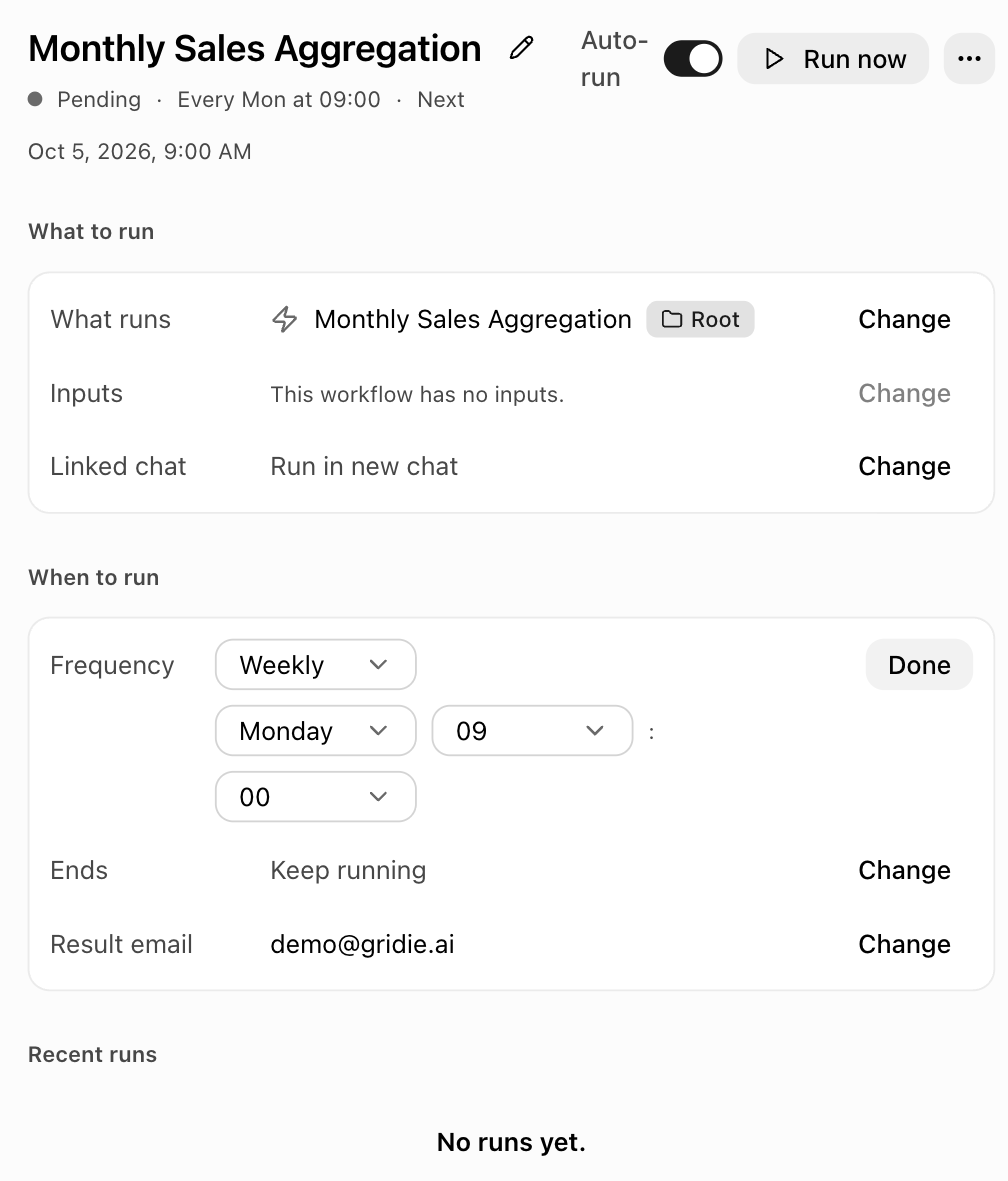
The person who created a schedule is the one who edits it. Click one of your schedules in the list to see its settings summarized row by row.
- The top shows the name along with the status, recurrence, and next run time. On the right, use the Auto-run switch to turn the schedule on or off, Run now to run it once right away, and More actions to change who can see it or delete it.
- Click Change on the row you want to edit and only that row opens. Edit the value and click Done to save that row immediately. Use Rename to change the name in place.
Working with your team
By default, a schedule is visible to every workspace member. To keep it to yourself, check Only me when creating it, or later choose More actions → Make it only visible to me. To share it again, choose Show it to members. You can also ask the agent, for example “make this schedule visible only to me.”
In the list, your private schedules carry an Only me tag, and schedules created by teammates show the creator’s profile photo.
Opening a teammate’s schedule shows a read-only view. You can see what runs and when, the end condition, recent run results, and who created it and when.
Pausing and stopping
A schedule keeps repeating until you stop it, but you can also set conditions for it to stop on its own.
- End date: stops running after a specific date and time.
- Run limit: stops after a set number of runs, counting all attempts — both successes and failures.
- Pause: to stop a schedule temporarily, turn off its Auto-run switch, then turn it back on when you need it to resume.
You can set these in plain language too.
"Only run this schedule until June 30"
"Run the weekly report schedule 10 times, then stop"
"Pause the weekly report schedule for now"
Once the end date passes or the run limit is reached, the schedule stops automatically. A stopped schedule can run again if you extend the end date or raise the run limit.
Reviewing results and history
When a schedule runs, the result is recorded in a chat. You can see exactly what the workflow or message did and how it turned out, right in the conversation.
Schedules run without a browser open, so you can also get an email each time one finishes, telling you whether it succeeded or failed. The recipient address is set per schedule, so a shared team address works too.
Each schedule also keeps a run history under Recent runs at the bottom of its screen:
- When it ran (run time)
- Whether it succeeded or failed (status)
- The error detail, if it failed
- The credits used for that run
The last row of the table shows the total number of runs and the credits used so far.

You can also click Run now to run a schedule once right away, without waiting for the scheduled time, to check that it works. This test run counts toward the run total and credits just like a normal run.
If the workflow a schedule runs is in the trash, the run is recorded as failed. Restore the workflow from the trash and the schedule runs normally again from its next run.
Credits and cautions
Running a schedule consumes credits, just like a regular agent or workflow run. Because it repeats automatically, setting the recurrence too frequently can use up credits quickly.
The more frequently a schedule runs (for example, hourly), the more credits it uses. Set only the recurrence you actually need, and check your usage regularly on the Settings > Subscription & Credits page.
You can review your remaining credits and usage history on the Subscription & Credits page.
 Gridie MCP